
Table of Contents
Introduction: The Art of Homemade Pizza Dough
A perfect pizza dough recipe is the foundation of any great pizza. Whether you’re a pizza lover who enjoys crafting artisanal pizza at home or a beginner in the kitchen, mastering the art of making dough is crucial to achieving restaurant-quality pizza. Homemade pizza offers the flexibility to create unique flavor combinations, control ingredients, and perfect the texture of your crust. While pizza toppings often get the spotlight, the crust is where true excellence lies, balancing crispy and chewy textures can elevate your pizza game to a whole new level.
In this guide, we’ll dive deep into the essential ingredients, techniques, and secrets for creating the perfect dough, offering insights for both pizza enthusiasts and beginners. By the end, you’ll have the confidence to whip up a pizza dough that rivals the best pizzerias. Let’s start by exploring the importance of the crust itself.
The Importance of a Perfect Crust
The crust is more than just the base for your toppings—it’s the heart and soul of the pizza. A well-crafted crust provides the ideal balance between crispy and chewy textures, offering a delightful bite that complements whatever you put on top. In this pizza dough recipe, the goal is to create a crust that has a slightly crisp exterior but remains tender and chewy on the inside. Achieving this balance is no small feat; it requires the right combination of ingredients, techniques, and baking methods.
Texture: Crispy and Chewy in Every Bite
When you bite into a slice of pizza, you want that initial crunch as your teeth sink into the crust, followed by a soft, chewy interior. This texture is the hallmark of a perfect pizza dough, and it’s what makes homemade pizza so satisfying. The right flour, hydration level, and kneading technique will help you achieve this combination. A crust that’s too crispy might feel dry, while one that’s overly chewy can feel doughy or undercooked. This guide will walk you through the steps to get it just right.
Flavor: The Role of Fermentation and Ingredients
The dough’s flavor is just as important as its texture. By using proper fermentation techniques, the dough develops complex flavors that elevate the overall taste of the pizza. For this pizza dough recipe, we’ll focus on slow fermentation, which allows the yeast to create natural sugars and enhance the dough’s flavor. Key ingredients like olive oil and salt also add depth, making the crust flavorful enough to stand on its own.
Structure: Supporting Your Toppings
A well-made crust not only tastes good but also supports the toppings. It needs to be sturdy enough to hold your sauce, cheese, and other ingredients without collapsing under the weight. Yet, it must also be light and airy. In this recipe, we’ll show you how to create a crust with the perfect balance of strength and lightness, ensuring that your pizza holds together beautifully from the first slice to the last.
Overview of the Recipe Secrets
Creating the perfect pizza dough is part art, part science. While it might seem simple—a mix of flour, water, yeast, and salt—the secrets to success lie in the details. For this pizza dough recipe, we’ll cover essential techniques like how to knead the dough to develop gluten, the importance of slow fermentation for flavor, and tips for achieving a balanced hydration level. Each step plays a role in creating the ideal crust, so it’s important to understand these secrets to truly master the recipe.
Kneading to Develop Gluten
Gluten development is key to a chewy and stretchy dough. We’ll guide you through the proper kneading techniques to ensure that your dough has the right elasticity, allowing it to stretch without tearing and form a strong, stable crust.
Slow Fermentation for Flavor
Patience is a key ingredient in this pizza dough recipe. Allowing the dough to ferment slowly, whether overnight in the fridge or over several hours at room temperature, gives the yeast time to develop flavor and structure. We’ll discuss the best fermentation methods to achieve optimal results.
Hydration and the Dough’s Texture
The water content in your dough (hydration) plays a huge role in the final texture of the crust. We’ll explain how to balance hydration to get a dough that’s easy to work with and produces a crust that’s both crispy on the outside and soft on the inside.
Targeting “Pizza Dough Recipe”
This guide is designed with both beginners and pizza aficionados in mind. If you’re new to making pizza at home, this pizza dough recipe will give you a solid foundation, with simple steps and clear instructions that make it easy to follow. For more experienced pizza makers, the detailed tips and advanced techniques will help you refine your skills and take your homemade pizza to the next level. Whether you’re looking for an easy dough recipe for a quick weeknight dinner or striving for artisanal perfection, this post has something for everyone.
A Beginner-Friendly Approach
If you’ve never made pizza dough before, don’t worry this recipe is easy to follow and includes detailed instructions at every step. You’ll learn the basics of dough-making, from mixing the ingredients to shaping the dough, in a way that’s accessible even for beginners.
Advanced Tips for Aficionados
For those who are already familiar with pizza-making, this post goes beyond the basics with expert tips on fermentation, dough hydration, and achieving the perfect texture. Whether you want to experiment with different types of flour or fine-tune your baking techniques, this guide will help you elevate your pizza dough to new heights.
Creating Consistent Results Every Time
One of the challenges of making pizza dough at home is achieving consistent results. This recipe is designed to help you create a reliable, repeatable process so that you can enjoy perfect pizza crusts every time you bake. We’ll provide troubleshooting tips and variations that allow you to adapt the recipe to your kitchen conditions, ensuring success no matter where you are on your pizza-making journey.
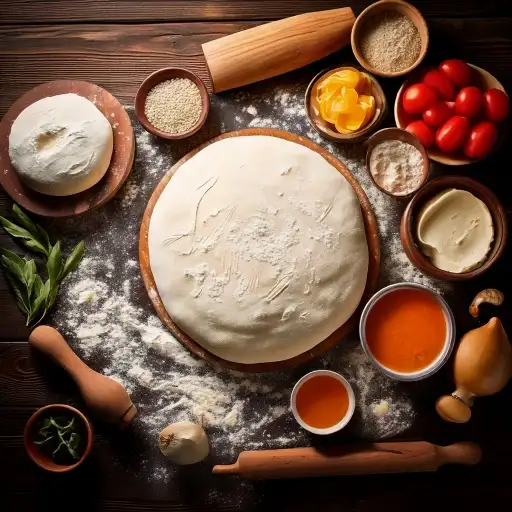
Essential Ingredients & Tools for the Perfect Dough
Creating the perfect pizza dough recipe requires not only the right techniques but also an understanding of the essential ingredients and tools. Each component, from the type of flour used to the quality of your yeast, has a significant impact on the final result—whether you’re aiming for a chewy, crispy, or fluffy crust. Additionally, the tools you use can greatly influence the ease of preparation and the quality of your pizza crust. Below, we’ll break down each of these elements and explain how they contribute to the success of your pizza dough recipe.
Flour & Gluten
When it comes to making a perfect pizza dough recipe, choosing the right flour is critical. The type of flour you use determines the dough’s texture, chewiness, and strength. Gluten, a protein found in flour, plays a key role in providing the elasticity and structure needed to achieve that iconic pizza crust. Let’s break down the most common types of flour and how they influence gluten development.
00 Flour vs. Bread Flour
00 flour, traditionally used in Italian pizza dough recipes, is finely milled and has a lower protein content compared to bread flour. It creates a soft, chewy dough with a tender bite, making it ideal for thin-crust pizzas like Neapolitan style. Its fine texture also ensures that the dough can be stretched easily without tearing.
On the other hand, bread flour has a higher protein content, typically around 12-14%, which means it produces more gluten. This results in a sturdier, chewier dough that can hold up to heavier toppings. Bread flour is often used in American-style pizzas where a thicker, heartier crust is desired.
The Role of Gluten in Pizza Dough
Gluten development is what gives pizza dough its structure. When you mix flour and water, the gluten proteins combine to form a network that traps air bubbles created by yeast during fermentation. The more gluten you develop through kneading, the more elastic and strong your dough becomes. However, over-kneading can lead to a tough, dense crust, so finding the right balance is key.
Yeast & Fermentation
Yeast is the driving force behind the rise and flavor of your pizza dough. Understanding the different types of yeast and the fermentation process can take your pizza dough recipe to the next level. The fermentation process not only makes the dough rise but also develops complex flavors that give your pizza crust depth and character.
Active Dry Yeast vs. Instant Yeast
There are two main types of yeast you’ll encounter when making pizza dough recipes: active dry yeast and instant yeast. Active dry yeast must be dissolved in warm water before use, while instant yeast can be mixed directly into the dough with the dry ingredients. Both types of yeast work to leaven the dough, but instant yeast tends to work faster and may be more convenient for beginners or those short on time.
While both yeasts are effective, the fermentation time is what truly matters. Longer fermentation allows the yeast to break down starches in the flour, releasing flavors and gases that create the light, airy bubbles in a well-risen dough. For those looking to perfect their pizza dough recipe, cold fermentation in the refrigerator over 24-48 hours is highly recommended for enhanced flavor.
Importance of Fermentation in Flavor
The fermentation process is not just about making your dough rise; it’s essential for flavor development. As the yeast feeds on the sugars in the flour, it produces carbon dioxide, which makes the dough rise, and ethanol, which gives the dough a slightly tangy flavor. Longer fermentation times lead to a more flavorful crust, with a complex taste and a desirable texture. The ideal pizza dough recipe allows the dough to ferment for at least 8 hours, but for the best results, many pizza chefs opt for a 24-48 hour cold fermentation.
Hydration, Salt, & Olive Oil
Hydration (the water-to-flour ratio), salt, and olive oil are three critical elements that work together to affect the dough’s consistency, flavor, and texture. Achieving the right balance of these ingredients ensures that your pizza dough recipe yields a perfect crust.
Hydration Levels and Dough Texture
Hydration refers to the percentage of water used relative to the amount of flour in your dough. For example, a dough with 65% hydration contains 65 grams of water for every 100 grams of flour. Higher hydration results in a stickier, more pliable dough that produces large, airy bubbles in the crust. Lower hydration doughs, on the other hand, are easier to handle and result in a denser, crispier crust.
For most pizza dough recipes, a hydration level between 60% and 70% is recommended. If you prefer a Neapolitan-style pizza, you may want to opt for the higher end of that range for a soft, chewy texture.
Salt: Enhancing Flavor and Controlling Fermentation
Salt is essential in a pizza dough recipe for two reasons: flavor and fermentation control. Salt enhances the flavor of the dough, preventing it from tasting bland. Additionally, salt slows down yeast activity, which is important for controlling the dough’s rise and ensuring that it doesn’t overproof. A typical pizza dough recipe will call for about 2% salt relative to the flour weight.
Olive Oil: Adding Tenderness and Flavor
Incorporating olive oil into your pizza dough recipe adds both flavor and tenderness to the crust. Olive oil helps to prevent the dough from drying out during baking and contributes to the crispy exterior while keeping the inside soft. It also makes the dough easier to work with, as it reduces stickiness and adds a subtle richness to the overall taste.
Kitchen Tools & Equipment
While the ingredients are the backbone of any pizza dough recipe, the tools and equipment you use can make the preparation process smoother and more efficient. Having the right tools will ensure that you get the most out of your dough and achieve professional-level results at home.
Mixing Bowls and Dough Scrapers
Using a large mixing bowl gives your dough plenty of room to rise and develop during fermentation. A dough scraper is a handy tool that helps you handle sticky dough more easily, making it simpler to knead and shape without excess flour.
Rolling Pins vs. Hand Stretching
Though many traditional pizza makers prefer hand stretching to preserve the dough’s natural air bubbles, a rolling pin can be useful for beginners who are still mastering dough handling. Just be careful not to overwork the dough, as you may lose the airy, light texture of the crust.
Baking Stones and Pizza Ovens
To achieve a crispy, evenly cooked crust, investing in a pizza stone or a pizza oven is key. A pizza stone mimics the effect of a brick oven by distributing heat evenly and absorbing moisture from the dough, resulting in a beautifully crisp bottom. A dedicated pizza oven, if you have one, will take your pizza dough recipe to the next level by reaching higher temperatures than a conventional oven can, baking the pizza in just a few minutes.
Step-by-Step Guide to Making Your Pizza Dough
Crafting the perfect pizza dough recipe is an art that balances precision, patience, and the right techniques. Whether you’re a seasoned chef or just getting started, this step-by-step guide will help you master the process. From mixing and kneading to shaping and resting, we’ll break down each stage so that you can confidently create a dough that is both crispy and chewy. Let’s dive in!
1. Mixing and Kneading Techniques
The first step in any pizza dough recipe is combining the ingredients in the right way to ensure proper gluten development. Gluten gives the dough its elasticity and strength, which is essential for achieving the chewy texture we all love.
1.1. Combining the Ingredients
To start, you’ll need to combine your dry ingredients, including your flour (00 flour or bread flour), salt, and yeast. In a separate bowl, mix water and olive oil. Gradually incorporate the wet ingredients into the dry, stirring with a wooden spoon or using a stand mixer with a dough hook attachment. The goal is to bring everything together into a shaggy dough—this is the foundation of your pizza dough recipe.
1.2. Kneading the Dough
Once your ingredients are combined, it’s time to knead the dough. Kneading is essential because it allows the gluten strands to stretch and form, creating a structure that traps air and gives the dough its characteristic chewy texture. To knead by hand, turn the dough onto a floured surface and fold it in half, pushing it down and out with the heels of your hands. Rotate the dough and repeat for about 8-10 minutes until it becomes smooth and elastic. If using a stand mixer, knead on medium speed for about 6 minutes.
1.3. Testing for Gluten Development
A good way to test if your dough is ready is by performing the “windowpane test.” Take a small piece of dough and stretch it between your fingers. If it stretches thin enough without tearing and allows light to pass through, your gluten is fully developed, and you’re ready for the next step in your pizza dough recipe.
2. Dough Fermentation & Rising
One of the secrets to achieving a flavorful pizza dough recipe lies in fermentation. Fermentation is the process that allows yeast to break down sugars, producing carbon dioxide and alcohol, which contribute to the dough’s flavor and structure.
2.1. The First Rise
After kneading, place your dough in a lightly oiled bowl, cover it with a damp cloth or plastic wrap, and allow it to rest in a warm, draft-free area. This is known as the first rise or bulk fermentation. Depending on the temperature and yeast activity, this process can take anywhere from 1 to 2 hours. You’ll know the dough is ready when it has doubled in size.
2.2. Cold Fermentation for Flavor
For an even more flavorful pizza dough recipe, consider using cold fermentation. After the initial rise, punch down the dough and transfer it to the refrigerator for 24-48 hours. This extended fermentation slows down yeast activity, allowing the dough to develop a richer, more complex flavor. Cold fermentation also improves the texture, making it easier to stretch when it’s time to bake.
2.3. Punching Down the Dough
After fermentation, gently punch down the dough to release any large air bubbles. This step redistributes the gases in the dough, creating a more uniform texture for your final pizza. Once the dough is punched down, it’s ready to be shaped into your pizza base.
3. Shaping and Resting
Shaping your pizza dough recipe properly is critical to achieving that perfect, crispy, and chewy crust. This step requires a delicate touch to avoid deflating the dough while still stretching it to the desired thickness.
3.1. Dividing the Dough
Depending on how many pizzas you plan to make, you can divide the dough into equal portions. Use a bench scraper or a sharp knife to cut the dough, ensuring you handle it gently to avoid knocking out too much air. Each portion should weigh about 250-300 grams for a standard pizza.
3.2. Stretching the Dough
To shape the dough, lightly flour a work surface and begin pressing the dough outwards from the center using your fingers. The goal is to push the air from the center towards the edges, creating a thicker outer crust. As the dough begins to flatten, use your hands to gently stretch it into a circle. Avoid using a rolling pin, as it can flatten the dough too much and lead to a less airy crust. For the best results, aim for a thickness of about ¼ inch in the center, with a slightly thicker edge.
3.3. Resting the Shaped Dough
Once shaped, allow the dough to rest for 10-15 minutes before adding toppings. This resting period allows the gluten to relax, making the dough easier to handle and preventing it from shrinking when transferred to the oven.
4. Tips for Beginners
If you’re new to making a pizza dough recipe from scratch, don’t worry! These beginner-friendly tips will help you avoid common pitfalls and improve your results.
4.1. Start with Room Temperature Ingredients
Working with room-temperature ingredients ensures that the yeast activates properly and that the dough mixes more easily. Cold ingredients can slow down fermentation and kneading, making the process more difficult.
4.2. Don’t Over-Knead the Dough
While kneading is important, over-kneading can cause the dough to become too tough, making it difficult to stretch. Pay attention to the dough’s texture—once it becomes smooth and elastic, stop kneading.
4.3. Be Patient with Fermentation
Many beginners rush through the fermentation process, but this step is crucial for flavor development. Always allow your dough to rise fully, whether you’re using a quick rise or opting for cold fermentation.
4.4. Practice Makes Perfect
Don’t be discouraged if your first pizza dough recipe isn’t perfect. The more you practice, the better you’ll become at judging when the dough is ready and handling it properly. Over time, you’ll be able to fine-tune the recipe to suit your tastes and techniques.
Secrets to a Crispy, Chewy Pizza Crust
Achieving that coveted balance between a crispy exterior and a chewy interior is the hallmark of a perfect pizza. This section dives into the technical aspects and creative tweaks that can transform your pizza dough into a work of art. From mastering the oven’s heat to fine-tuning your hydration levels, you’ll discover how each element contributes to the final texture. Whether you’re using a professional pizza oven or your home setup, these detailed insights and actionable tips will guide you through creating a crust that stands out in both flavor and structure.
Optimal Oven Temperature & Baking Methods
Ensuring even heat distribution is vital for a well-cooked pizza crust. The right oven temperature and baking techniques not only develop that ideal crispiness on the outside but also preserve the chewy integrity of the dough within.
Using a Pizza Oven
Pizza ovens are designed to replicate the high, intense heat of traditional brick ovens.
- High Heat Benefits: The extreme temperatures create a rapid baking process that crisps the outer layer while sealing in moisture for a tender center.
- Flavor Infusion: Whether wood-fired or gas-powered, these ovens often impart a distinctive smoky flavor that enhances the overall taste profile of the pizza.
Baking Stone vs. Baking Steel
Both baking stones and steels are excellent tools to simulate the high heat needed for a perfect crust.
- Baking Stone Advantages: Stones retain heat and help absorb moisture from the dough’s surface, leading to a drier, crisper crust.
- Baking Steel Benefits: Steels offer superior heat conductivity, reducing cooking time and promoting an evenly browned base.
- Maintenance & Usage: Proper preheating and regular cleaning ensure that both tools perform at their best for consistent results.
Preheating Your Oven
A properly preheated oven is essential for a uniform bake.
- Temperature Consistency: Allow your oven ample time to reach and maintain the desired high temperature, ensuring that your pizza bakes evenly.
- Preheat Duration: Invest in a few extra minutes to preheat your stone or steel; this step is crucial for avoiding a soggy crust caused by uneven heat distribution.
Even Heat Distribution Techniques
Even heat is the secret behind that consistently crispy and chewy crust.
- Rotational Baking: Consider rotating your pizza halfway through the bake to counteract any hot spots.
- Temperature Monitoring: Use an oven thermometer to double-check that your oven maintains a stable temperature, as fluctuations can affect the final texture.
Achieving the Right Hydration
The water-to-flour ratio is pivotal in determining the dough’s texture, directly affecting gluten formation and moisture retention. Striking the right balance can yield a dough that is supple, extensible, and perfectly primed for a crisp yet chewy finish.
Water to Flour Ratio
The hydration level is a fundamental factor in creating an ideal pizza dough.
- Finding the Balance: Experiment with different ratios to achieve a dough that is both pliable and strong, typically starting around 60-65% hydration.
- Consistency Adjustments: Fine-tune the ratio based on the type of flour you use; high-protein flours may require slightly more water.
The Impact of Hydration on Gluten Formation
Water activates the gluten network, essential for the dough’s structure and elasticity.
- Gluten Development: Adequate hydration allows the gluten strands to stretch and align, contributing to a chewy bite.
- Texture Considerations: Too much water can weaken the gluten matrix, while too little may lead to a dense, unyielding crust.
Adjusting for Humidity & Temperature
Environmental factors play a significant role in how your dough behaves.
- Climate Variations: In humid conditions, reduce water slightly to prevent an overly sticky dough; in drier climates, a touch more water can compensate for evaporation.
- Adaptive Techniques: Keep a kitchen journal to record adjustments, ensuring that you can replicate the perfect hydration balance in future batches.
Tips for a Soft Yet Crispy Dough
Achieving a harmonious balance between softness and crispiness is an art.
- Resting Periods: Allowing the dough to rest helps the water to be fully absorbed and evenly distributed, contributing to a more uniform texture.
- Kneading Practices: Gentle, extended kneading encourages optimal gluten development without overworking the dough, preserving the desired chewiness.
Balancing Crispy and Chewy Elements
A great pizza crust needs a dual personality: a satisfyingly crisp bite that gives way to a tender, chewy interior. This section outlines the techniques necessary to maintain this balance through precise control over baking time, temperature, and ingredient synergy.
Achieving the Crisp Factor
Crispiness is attained by ensuring that the dough’s surface dries out enough during baking.
- High-Heat Techniques: Utilize intense, short bursts of heat to create a thin, crispy layer on the exterior.
- Moisture Management: A light spritz of water on the dough before baking can help achieve a controlled crisp by initiating rapid surface drying.
Ensuring a Chewy Center
The interior’s chewiness stems from proper gluten development and fermentation.
- Fermentation Time: Allow the dough ample time to ferment; slow fermentation helps develop flavor and creates a resilient structure.
- Gluten Integrity: A well-kneaded dough with balanced hydration supports a chewy center that stands up to hearty toppings without becoming too dense.
Optimizing Baking Time
Baking time is crucial to achieving the ideal textural contrast.
- Precision in Timing: Monitor your pizza closely; a few extra minutes can turn a perfectly balanced dough into one that’s overcooked and dry.
- Visual Cues: Look for a golden-brown hue and a slight char on the edges as indicators that the crust has reached optimal crispiness without sacrificing chew.
Post-Baking Resting Period
Allowing the pizza to rest after baking can further refine its texture.
- Cooling Benefits: A brief resting period on a cooling rack lets steam escape, preventing sogginess and ensuring the crust retains its crispness.
- Final Texture Check: This resting phase helps set the dough’s structure, offering a final opportunity for the balance between crisp and chewy to manifest perfectly.
Optional Enhancements
While the core recipe is crucial, optional enhancements allow you to customize your pizza dough and elevate its flavor profile. These creative touches can make your crust stand out and reflect your culinary style.
Incorporating Flavor Boosters (Herbs, Spices)
Adding herbs and spices directly into the dough can infuse subtle, complex flavors.
- Herbal Infusions: Consider mixing in dried oregano, basil, or a pinch of rosemary to give the dough an aromatic lift.
- Spice Variations: A hint of garlic powder or crushed red pepper flakes can add an extra dimension, making your crust more flavorful and memorable.
Using Specialty Oils
Specialty oils can transform the taste and texture of your dough.
- Infused Olive Oils: Drizzle a bit of garlic-infused or chili-infused olive oil over the dough before baking to create a delicate flavor layer.
- Enhancing Mouthfeel: Specialty oils can also help in achieving a more tender crumb, balancing the crust’s crisp exterior with a richer flavor.
Infused Dough Variations
Experiment with different liquid bases to subtly alter the dough’s character.
- Alternative Liquids: Replace a portion of the water with beer, milk, or even a vegetable broth to introduce nuanced flavors.
- Citrus Zest: A little lemon or orange zest can brighten the overall profile, making your pizza uniquely refreshing.
Finishing Touches with Toppings
The final stage of your pizza creation can also influence the crust’s texture.
- Pre-Bake Strategies: Consider a par-bake approach, where the crust is partially baked before adding toppings, to maintain crispness.
- Creative Toppings: Experiment with light toppings or those that release minimal moisture, ensuring that the crust remains crispy without becoming soggy.
Troubleshooting & Expert Tips for Dough Perfection
Crafting the perfect pizza dough recipe can sometimes be tricky, even for experienced home chefs. Whether you encounter issues with the dough’s texture, rising, or flavor, there are simple fixes and expert tips to help you perfect your homemade pizza every time. This section will address common challenges you might face when preparing pizza dough, along with advice on how to adapt the recipe to suit your personal preferences or specific conditions. You’ll also discover creative variations to spice up your dough and learn how to store it for future use, ensuring your pizza-making journey is as smooth and enjoyable as possible.
Common Pitfalls & How to Fix Them
When following a pizza dough recipe, several common pitfalls can occur, affecting the dough’s texture, rise, and flavor. Recognizing these issues and knowing how to fix them can make the difference between an average pizza and one with a perfectly crispy, chewy crust.
Over-Kneading the Dough
One frequent mistake is over-kneading the dough, which can lead to a tough and chewy crust. Over-kneading develops too much gluten, making the dough difficult to stretch and resulting in a dense, unappealing texture. To avoid this, knead the dough until it’s smooth and elastic but still soft. Typically, this takes around 8–10 minutes by hand. If you’re using a stand mixer, knead on low speed to prevent overworking the dough. If you suspect you’ve already over-kneaded, allow the dough to rest longer during fermentation to relax the gluten strands.
Under-Proofing or Over-Proofing
Proper proofing is essential for achieving the right rise and texture in your pizza dough. Under-proofed dough lacks flavor and tends to be dense, while over-proofed dough can collapse and become too sticky. For best results, allow your dough to rise in a warm, draft-free environment until it has doubled in size. The fermentation time typically ranges from 1 to 2 hours, depending on the yeast and room temperature. If your dough hasn’t risen after 2 hours, check that your yeast is still active, and consider moving the dough to a warmer spot.
Climate and Environmental Factors
Environmental factors, such as humidity and temperature, can significantly impact your pizza dough recipe. In humid climates, the dough may absorb too much moisture, leading to stickiness. In this case, gradually add a bit more flour while kneading until the dough reaches the desired consistency. Conversely, in dry environments, you may need to increase the hydration slightly by adding a tablespoon of water at a time. It’s essential to be flexible with your ingredients and adjust based on your surroundings.
Adapting the Recipe
One of the beauties of any pizza dough recipe is its flexibility. Depending on your taste preferences, dietary restrictions, or available ingredients, you can tweak the recipe to make it uniquely yours. Here are a few ways to adapt your dough to suit your needs.
Adjusting Hydration Levels
The amount of water you use in your dough directly impacts the final crust texture. For a softer, chewier crust, increase the hydration by adding more water up to 70% hydration (70 grams of water per 100 grams of flour) for a lighter and more pliable dough. For a crispier crust, reduce the water content slightly and ensure you bake at a higher temperature. Experimenting with hydration levels will allow you to discover your preferred balance between crispy and chewy textures.
Substituting Flours
Different types of flour can dramatically alter the texture and flavor of your pizza dough. If you prefer a more rustic, nutty taste, consider swapping a portion of your all-purpose or bread flour for whole wheat or spelt flour. For those looking for a more delicate, soft dough, 00 flour is an excellent option, commonly used in authentic Italian pizza dough recipes. Be mindful of how much flour you substitute, as whole grain flours tend to absorb more water, and you may need to adjust the hydration accordingly.
Enhancing Flavor with Add-ins
To personalize your pizza dough recipe further, you can enhance the flavor by incorporating herbs, garlic, or even cheese directly into the dough. Adding a tablespoon of dried oregano or basil to the flour mixture can infuse the dough with subtle herbal notes. For a richer flavor, try incorporating a small amount of grated Parmesan or Romano cheese into the dough itself. These simple additions can elevate your homemade pizza to a restaurant-quality level.
Creative Variations
Pizza dough is versatile, allowing you to experiment with creative variations that can turn a standard recipe into something extraordinary. Whether you want to add new ingredients or experiment with alternative flours, the possibilities are endless.
Herb-Infused Pizza Dough
For a flavorful twist, consider making herb-infused pizza dough. Adding fresh or dried herbs such as rosemary, thyme, or oregano to the dough can create a delicious aromatic base that enhances the overall pizza experience. Simply mix the herbs with the flour before kneading the dough to distribute the flavor evenly. Herb-infused pizza dough pairs particularly well with lighter toppings like vegetables or white sauces, as the herbs provide a refreshing contrast to the richness of traditional tomato-based sauces.
Incorporating Spices
For those who enjoy a bit of heat or a unique flavor profile, adding spices like red pepper flakes, garlic powder, or smoked paprika to the dough can create a bold and distinctive pizza crust. These spices not only enhance the flavor of the crust but also complement a wide variety of toppings, from spicy pepperoni to smoky barbecue chicken. Adjust the spice level according to your preference, and feel free to mix and match different spices to create your own signature pizza dough recipe.
Gluten-Free or Alternative Flours
If you’re catering to dietary restrictions, consider experimenting with gluten-free or alternative flours. You can substitute traditional wheat flour with gluten-free options like rice flour, almond flour, or a pre-made gluten-free flour blend. While the texture will differ from classic pizza dough, these alternatives can still yield a tasty and satisfying crust. Keep in mind that gluten-free doughs may require extra binding agents like xanthan gum to mimic the elasticity of gluten.
Storing & Reusing Leftover Dough
One of the advantages of making pizza dough from scratch is that you can prepare large batches and store leftovers for future use. Properly storing and reusing leftover dough will save time and ensure you have fresh, homemade pizza whenever the craving strikes.
Refrigeration Method
If you plan to use your leftover pizza dough within a few days, refrigeration is the best option. After the dough has risen, divide it into portions (depending on the size of the pizzas you plan to make) and wrap each portion tightly in plastic wrap. Place the wrapped dough in an airtight container or resealable bag and store it in the fridge for up to 3 days. When you’re ready to use it, remove the dough from the fridge and let it come to room temperature for about 30 minutes before shaping and baking.
Freezing Dough for Later Use
For longer-term storage, freezing your pizza dough is a convenient solution. After the dough has risen, portion it, wrap it tightly in plastic, and place it in a freezer-safe bag. Frozen pizza dough can last for up to 3 months. To use, thaw the dough in the refrigerator overnight, then let it come to room temperature before shaping. Freezing pizza dough does not compromise its quality, and you can still achieve a delicious, crispy, and chewy crust.
Reusing Dough for Other Recipes
Leftover pizza dough can also be repurposed for other baked goods. You can use it to make garlic knots, breadsticks, or even flatbreads. These versatile options allow you to get creative and make the most out of your homemade dough. Simply shape the dough into your desired form, season with herbs or garlic, and bake until golden.
Conclusion:
Mastering the art of making pizza dough at home is a rewarding experience that opens up endless culinary possibilities. With just a few simple ingredients and the right techniques, you can create a dough that rivals your favorite pizzeria. Whether you prefer a thin and crispy crust or a soft and chewy base, this pizza dough recipe offers the flexibility to cater to your taste and toppings of choice.
By following the steps outlined in this guide, you’ll not only save money but also have complete control over the quality of your ingredients. Plus, there’s something truly satisfying about crafting a pizza from scratch, knowing that each bite was made with care. So, whether you’re hosting a pizza night or simply indulging in a comforting meal, this pizza dough recipe will become your go-to for creating the perfect pizza every time.
Remember, practice makes perfect, so don’t be afraid to experiment with different flours, hydration levels, and rising times. With a little patience and creativity, you’ll soon be impressing family and friends with your homemade pizza masterpieces.
** Similar meals that may interest you:
2 thoughts on “Perfect Pizza Dough Recipe: Secrets to a Crispy, Chewy Crust”