
Table of Contents
Have you ever dreamed of baking a loaf of bread that rivals your favorite bakery? With just a few simple ingredients and patience, you can create the perfect Italian baguette in your kitchen. This guide will walk you through every step, from mixing the dough to pulling a golden, crusty loaf out of the oven.
Inspired by the no-knead technique Jim Lahey popularizes, this recipe is designed for simplicity. You’ll use basic ingredients like flour, water, yeast, and salt to achieve a crispy crust and a chewy, airy crumb. No fancy equipment or advanced skills are required, just your hands and a little time.
Whether you’re a seasoned baker or a beginner, this method ensures professional results. By the end, you’ll have a delicious loaf of bread and a testament to your growing skills. Let’s get started on this rewarding culinary journey!
Introduction to Authentic Italian Baguettes
Baking bread at home connects you to centuries of tradition and innovation. The art of crafting the perfect loaf has evolved, blending time-tested techniques with modern methods. Whether you’re a novice or an experienced baker, understanding the roots of this culinary craft will elevate your skills.
Understanding the Tradition of Italian Baguette
Authentic bread-making, particularly when it comes to the Italian Baguette, is deeply rooted in tradition. While the classic French baguette is renowned for its crisp crust and airy interior, the Italian Baguette brings its own unique twist, often emphasizing a chewier texture and a slightly denser crumb. This difference arises from variations in dough preparation and baking techniques that reflect Italy’s regional diversity and culinary history.
Historically, Italian bakers have relied on slow fermentation to develop a rich, complex flavor in their bread. This process allows the yeast to work gradually, giving the bread a deeper, more nuanced taste. The traditional Italian baguette often undergoes long proofing periods, which enhance both the flavor and texture. The use of high-quality local ingredients, including water, flour, and olive oil, is another factor that contributes to the distinctive character of the Italian-style baguette.
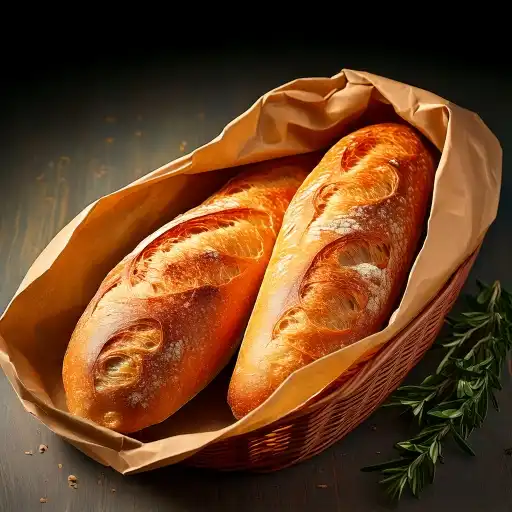
Unlike the French baguette’s golden-brown exterior, the Italian Baguette might feature a slightly softer crust, yet it retains a satisfying bite. It’s this combination of regional ingredients, slow fermentation, and precise timing that creates the perfect balance of flavor, chewiness, and density in each loaf. Whether served with olive oil, used as a sandwich base, or enjoyed on its own, the Italian baguette remains a staple of Italy’s rich bread-making tradition.
The No-Knead Revolution
In recent years, the no-knead method has transformed home baking. Popularized by Jim Lahey in New York, this technique simplifies the process by eliminating the need for extensive kneading. Instead, it relies on time and natural fermentation to develop the dough, creating an artisan-style loaf with a minimalistic approach.
This method has also made its way into the world of Italian baguettes, offering home bakers a chance to achieve the perfect blend of a crispy crust and soft, airy interior without the effort of traditional kneading. The slow fermentation allows the flavors to develop naturally, and the longer rise time helps create the signature texture that defines a great baguette.
For both home bakers and professional kitchens, this technique represents a balance between honoring tradition and embracing modern innovation. By reducing the labor-intensive aspects of bread making, the no-knead method has made baking Italian baguettes and other rustic breads more accessible to all skill levels. As one baker put it, “It’s not just about convenience—it’s about unlocking new depths of flavor with less effort.”
Whether you’re crafting a classic loaf or an Italian baguette, the no-knead revolution has become a game-changer in the bread-making world, offering an easier way to enjoy homemade, bakery-quality bread from the comfort of your own kitchen.
“The no-knead method is a game-changer for anyone who loves bread but lacks the time or equipment for traditional methods.”
| Traditional Method | No-Knead Method |
|---|---|
| Requires extensive kneading | No kneading needed |
| Shorter fermentation time | Longer fermentation for enhanced flavor |
| More hands-on effort | Minimal hands-on time |
By understanding these traditions and techniques, you’ll be better equipped to create bread that’s both delicious and authentic. Let’s dive deeper into the ingredients and tools you’ll need to get started.
Gather Your Ingredients and Tools
The foundation of great bread lies in the quality of your ingredients and equipment. To create a bakery-quality loaf, you’ll need a few essentials. Start with high-protein bread flour, which gives the dough its structure and chewiness. Combine it with all-purpose flour for a balanced texture.
Other key ingredients include fast-acting yeast, kosher salt, and warm water. These elements work together to create a flavorful, airy crumb. Don’t forget to measure everything accurately, precision is key in baking.

When it comes to tools, a large bowl is essential for mixing and fermenting the dough. A baking tray or pizza stone will help achieve a crispy crust. If you have a dough scraper, it’s perfect for shaping and handling the sticky dough.
Optional tools like a Dutch oven or a steam-generating dish can elevate your results. However, they’re not mandatory. With the basics, you can still create a loaf that’s both delicious and authentic.
| Essential Tools | Optional Tools |
|---|---|
| Large bowl | Dutch oven |
| Baking tray | Steam-generating dish |
| Dough scraper | Pizza stone |
Before you start, double-check your kitchen tools. Having everything ready will make the process smoother and more enjoyable. With the right ingredients and equipment, you’re well on your way to baking the perfect loaf.
Preparing the No-Knead Dough for an Italian Baguette
The magic of no-knead dough lies in its simplicity and hands-off approach. With just a few minutes of effort, you can create a dough that ferments beautifully overnight, developing rich flavor and texture—perfect for an authentic Italian Baguette.
Start by combining your dry ingredients. In a large bowl, mix bread flour, a precise amount of salt, and yeast. These ingredients are the foundation for any great bread, especially when aiming for that crispy crust and soft, chewy interior typical of an Italian Baguette. Gradually add warm water, stirring until the mixture forms a shaggy, wet dough. This process is quick, taking only a few minutes, but it is essential for setting the stage for the dough to rise properly.
Once mixed, cover the bowl with plastic wrap or a damp cloth. Let the dough sit at room temperature for 12 to 14 hours. During this time, natural fermentation will develop the gluten, resulting in a bubbly, airy texture, which is the hallmark of a well-made Italian Baguette. If your kitchen is particularly warm, consider refrigerating the dough to slightly slow down the fermentation process and avoid over-proofing.
Here are a few tips to ensure perfect results for your Italian Baguette:
- Measure the salt accurately: Salt is crucial not only for flavor but also for controlling yeast activity, which directly impacts the texture and rise of your baguette.
- Use warm water (around 100°F): Warm water helps activate the yeast effectively, ensuring the dough rises well.
- Let the dough rest undisturbed: Even if it looks loose or sticky, give it the full 12-14 hour fermentation period. This resting phase allows the dough to develop the structure needed for that distinctive Italian Baguette crumb and flavor.
As one baker wisely said, “Patience is the key to good bread.” When preparing a no-knead Italian Baguette, letting the dough slowly ferment will reward you with a loaf that’s crisp on the outside and perfectly airy on the inside just like those found in traditional Italian bakeries.
“Patience is the secret ingredient in no-knead bread. Let time do the work for you.”
After 12 to 14 hours, your dough should be bubbly and ready for shaping. Despite its loose appearance, it’s perfectly prepared for the next step. This hands-off method proves that great bread doesn’t require hours of kneading, just a little planning and trust in the process.
Mastering the Italian Baguette Shaping Technique
Shaping dough into a perfect “Italian baguette” is both an art and a science. The process transforms a simple dough into a rustic, elongated loaf with a crisp crust and airy crumb. Start by gently transferring your bubbly no-knead dough onto a lightly floured surface. This prevents sticking and makes handling easier.
Begin by nudging the dough into a rectangular shape. Using your hands, fold the sides toward the center, creating a log. Roll the dough carefully, ensuring that each fold contributes to the final form. This step is crucial because it helps maintain the dough’s structure while developing the iconic baguette shape.
The key to mastering the Italian baguette technique lies in the stretching process. Stretching the dough gently is vital for achieving that signature long, slender look. However, be cautious—over-stretching can tear the dough and affect the final texture, resulting in a loaf that is too dense or flat. As one experienced baker advises, “The dough should feel elastic but not overly stretched. Let the dough guide you as you shape it.”
An important aspect of the Italian baguette is the crust. To achieve the crisp exterior, allow the dough to rest after shaping, ensuring that the surface becomes taut. This helps lock in moisture and creates steam during baking, which is essential for a golden-brown crust. For best results, score the top of the loaf with shallow cuts, allowing the bread to expand evenly in the oven.
Achieving mastery over the Italian baguette shaping technique may take some practice, but once perfected, it opens the door to endless baking possibilities. Whether you’re serving it with olive oil and balsamic vinegar or using it for sandwiches, the beautifully shaped Italian baguette is sure to impress.
Incorporating this skill into your bread-baking repertoire will elevate your homemade loaves and bring the authentic taste of Italy into your kitchen.
“Proper shaping is the secret to a bakery-quality loaf. It’s all about patience and precision.”
Here’s a quick guide to shaping your dough:
- Flour your surface lightly to prevent sticking.
- Fold the dough into a rectangle, then roll it into a log.
- Stretch gently to achieve the desired length and shape.
Common mistakes include rough handling and over-stretching. These can lead to an uneven top surface and a misshapen loaf. Take your time to ensure the dough retains its structure and airiness.
| Do’s | Don’ts |
|---|---|
| Use a floured surface | Over-stretch the dough |
| Fold and roll gently | Handle the dough roughly |
| Stretch with care | Skip the resting period |
Mastering this technique is key to transforming your dough into an artistic baguette. With practice, you’ll achieve a loaf that’s not only delicious but also visually stunning.
Essential Proving and Preheating Methods
Achieving the perfect rise and bake starts with mastering proving and preheating. These steps ensure your dough develops the right texture and flavor while creating the ideal environment for baking.
After shaping, let your dough rest for about 30 minutes. This brief proving period allows it to rise slightly and relax. To test readiness, gently press the dough. If it springs back slowly, it’s ready for the oven.
Preheating is equally important. Place a baking stone on the middle rack and a tray on the bottom shelf of the oven. Heat your oven to 425°F (220°C) for at least 30 minutes. This setup ensures even heat distribution and a crispy crust.
Creating steam is key to delaying crust formation. Pour cold water into an upturned roasting tin placed on the bottom shelf of the oven. The steam keeps the dough moist, allowing it to rise fully and develop an open crumb.
Here are some tips for optimal results:
- Adjust proving time based on room temperature. Warmer environments may require less time.
- Use a baking stone to retain heat and mimic professional ovens.
- Monitor steam levels to prevent over-drying or soggy crusts.
As one baker shared,
“Steam is the secret to a golden, crackling crust. It’s what separates good bread from great bread.”
By combining proper proving and preheating techniques, you create the perfect canvas for bread baking. These methods ensure your loaf rises beautifully and bakes to golden perfection.
Baking and Finishing to Golden Perfection
The final steps of baking transform your dough into a golden, crusty masterpiece. Carefully transfer the shaped dough onto a preheated pan, ensuring it’s evenly distributed. This step is crucial for even baking and a professional finish.
Place a cover over the pan during the first phase of baking. This traps steam, promoting an even rise and a soft interior. After 15 minutes, remove the cover to allow the crust to develop a rich, dark golden color.
For an extra touch of flavor, lightly brush the crust with melted butter or olive oil. This enhances the finish and adds a subtle richness. As one baker noted,
“A little butter or oil can elevate your bread from good to unforgettable.”
To check for doneness, tap the bottom of the loaf. A hollow sound indicates it’s fully baked. If your oven has a glass window, use it to monitor progress without opening the door.
Here’s a quick guide to perfect baking:
- Preheat your pan for even heat distribution.
- Use a cover to trap steam and promote rise.
- Uncover for the final 10 minutes to achieve a golden crust.
| Baking Phase | Key Action |
|---|---|
| Initial | Cover the pan to trap steam |
| Final | Uncover for a golden crust |
| Finish | Brush with butter or olive oil |
Once baked, let the loaf cool slightly before slicing. The result is a visually stunning bread, perfect for hearty sandwiches or enjoying on its own. With these techniques, you’ll achieve bakery-quality results every time.
Serving, Storage, and Creative Recipe Variations
Your freshly baked bread deserves to be enjoyed in the most delicious ways. Whether you’re serving it as a snack or incorporating it into a meal, there are endless possibilities to explore.
For a simple yet satisfying treat, slice the bread and pair it with your favorite cheese. Add a few olive slices or a drizzle of olive oil for extra flavor. This combination is perfect for a quick appetizer or a light lunch.
When it comes to storage, keeping your bread fresh is key. Wrap it in foil or place it in a paper bag at room temperature for up to three days. For longer storage, slice the loaf and freeze it in an airtight container. When ready to enjoy, simply reheat the slices in the oven for a crispy texture.
Here are some creative ways to serve and customize your bread:
- Turn it into crostini by toasting thin slices and topping them with tomatoes, basil, and a splash of olive oil.
- Use it as a base for hearty sandwiches, layered with meats, veggies, and spreads.
- Experiment with different toppings like roasted garlic, herbs, or a sprinkle of cheese.
As one baker shared,
“The beauty of homemade bread lies in its versatility. A few tweaks can transform it into something entirely new.”
If you’re feeling adventurous, try adding ingredients like chopped olives or herbs directly into the dough before baking. These small changes can elevate the flavor and make your bread even more unique.
For reheating, place the bread in a preheated oven at 350°F for 5-10 minutes. This restores its crispiness and makes it taste freshly baked. Whether you’re serving it warm or at room temperature, your bread will always be a crowd-pleaser.
With these tips and ideas, you can enjoy your bread in diverse and enticing ways. From simple snacks to gourmet appetizers, the possibilities are endless.
Conclusion
There’s nothing quite like the satisfaction of baking your loaf. From selecting simple ingredients to mastering the no-knead method, each step is designed for ease and precision. The slow fermentation process ensures a rich flavor, while careful shaping and baking techniques create a rustic, artisanal finish.
Attention to details, like preheating the bottom shelf and placing the dough on the right shelf, makes all the difference. The result is a golden, crusty bread that rivals any bakery creation, much like a perfectly crafted cake.
Don’t be afraid to experiment with serving styles or recipe variations. Whether enjoyed fresh or stored for later, your homemade loaf will elevate every meal. Baking bread is more than a skill—it’s a rewarding, creative experience that brings joy to your kitchen.
** Similar meals that may interest you:
How to Make Perfect Biscuits and Gravy from Scratch
How to Make the Perfect Breakfast Burrito