
Table of Contents
Introduction
Italian cuisine is synonymous with tradition, passion, and a deep connection to heritage. At the heart of this culinary legacy is artisan Italian bread, a rustic, crusty loaf that embodies centuries of time-honored techniques and genuine love for good food. Known for its irresistible aroma and satisfying texture, artisan Italian bread plays a central role in Italian dining. It serves as a staple accompaniment to meals and a symbol of the country’s rich gastronomic history.
Baking your own homemade artisan Italian bread is an art form that invites you to reconnect with these traditions. From carefully selecting simple ingredients like flour, water, yeast, olive oil, and salt, to the meticulous process of kneading and fermenting the dough, every step is a celebration of Italian culinary craftsmanship. Whether you’re an experienced baker or a curious beginner, the allure of crafting this authentic bread at home promises not only a delicious result but also a fulfilling journey into the heart of Italian cuisine.
What is Artisan Italian Bread?
Artisan Italian bread is more than just a staple food, it’s a celebration of tradition, craftsmanship, and the simple pleasures of authentic Italian cuisine. This section explores the essence of artisan bread, delving into its definition, key characteristics, and the various types that highlight the diversity of Italian baking. Understanding these aspects not only deepens your appreciation for the craft but also equips you with the knowledge to recreate these time-honored recipes at home.
Definition of Artisan Bread
Artisan bread is defined by its meticulous handmade process and adherence to traditional baking methods. Unlike mass-produced breads, artisan loaves are crafted with care, using simple, high-quality ingredients and techniques passed down through generations.
Handmade Craftsmanship
Artisan bread is produced by skilled bakers who rely on manual techniques rather than automated processes. This hands-on approach allows for careful attention to detail from mixing the dough by hand to the artful scoring of the loaf before baking. Each step is carried out with a deep respect for tradition, ensuring that every loaf is unique and imbued with character.
Traditional Methods and Techniques
The methods used in crafting artisan bread remain rooted in history. Techniques such as long fermentation, careful kneading, and slow baking are integral to achieving the desired texture and flavor. These time-tested practices not only enhance the bread’s taste but also help develop complex flavors and an airy, open crumb that machine-made breads often lack.
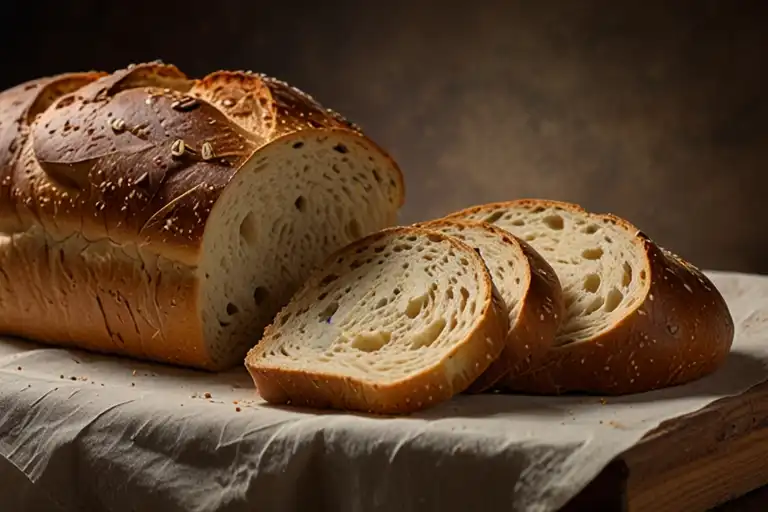
Key Characteristics of Artisan Italian Bread
Artisan Italian bread is renowned for its distinctive qualities that set it apart from other types of bread. These key characteristics, ranging from its robust crust to its light, airy interior, reflect both the skill of the baker and the high standards of traditional Italian baking.
Crusty Exterior
One of the most celebrated features of artisan Italian bread is its beautifully crusty exterior. This characteristic crust is achieved through high-temperature baking, often with the aid of steam, which helps form a thin, crisp layer that not only looks enticing but also provides a satisfying crunch with every bite.
Soft and Airy Crumb
Beneath the firm crust lies a soft, airy crumb. This interior texture is the result of careful fermentation and gentle handling of the dough, which allows air pockets to develop naturally. The open crumb structure is a hallmark of artisan breads, offering a delicate balance between softness and structure that melts in your mouth.
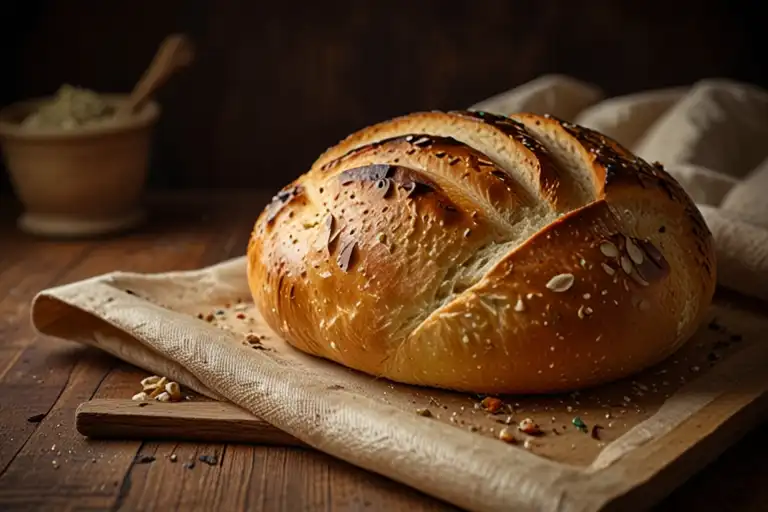
Rustic Appearance
The rustic, handmade appearance of artisan Italian bread speaks to its authenticity. Unlike uniformly shaped commercial loaves, artisan bread often features irregular shapes and natural imperfections that tell the story of its handcrafted origins. This rustic charm is part of what makes artisan Italian bread so appealing, it’s as much a feast for the eyes as it is for the palate.
Types of Italian Artisan Bread
Italian cuisine offers a rich variety of artisan breads, each with its unique flavor profile and cultural significance. From the airy ciabatta to the robust filone, each type brings its character to the table and reflects the diverse regional traditions of Italy.
Ciabatta
Ciabatta is known for its elongated shape, porous interior, and crisp crust. Originating from Italy’s Veneto region, this bread is perfect for making paninis or serving alongside hearty Italian dishes. Its texture is ideal for absorbing sauces and olive oil, making it a favorite for many Italian meals.
Focaccia
Focaccia is a versatile, flat bread that can be enjoyed as a snack, appetizer, or side dish. Typically seasoned with olive oil, rosemary, and sea salt, this bread is celebrated for its soft interior and slightly crunchy exterior. Variations abound across Italy, with some recipes incorporating additional toppings such as tomatoes or olives.
Pane Toscano
Pane Toscano hails from the Tuscany region and is characterized by its saltless composition. This bread’s mild flavor makes it an excellent companion for flavorful dishes, particularly Tuscan soups and stews. The absence of salt allows the natural taste of the wheat to shine through, offering a unique and authentic Italian experience.
Filone
Filone is a classic Italian loaf that boasts a robust flavor and firm texture. Often enjoyed with olive oil or used as the base for bruschetta, this bread’s dense yet tender crumb makes it a versatile addition to any meal. Its traditional preparation methods emphasize slow fermentation, which enhances both flavor and nutritional value.
Each of these types of Italian artisan bread contributes to the rich tapestry of Italian culinary tradition. Whether you’re savoring the simplicity of a pane Toscano or the aromatic allure of a freshly baked focaccia, the artistry behind these breads offers a genuine taste of Italy’s storied gastronomic heritage.
Ingredients for Authentic Artisan Italian Bread
Before you embark on your baking journey, it’s essential to understand how each ingredient contributes to creating the perfect loaf. The magic of artisan Italian bread lies in its simplicity using a handful of high-quality, time-honored ingredients that work together to deliver a crusty exterior, an airy crumb, and a rich flavor profile. Below, we break down these ingredients into detailed sections to help you master your homemade artisan Italian bread.
Essential Ingredients
Every great loaf starts with a few core components. Each ingredient plays a distinct role in the structure, flavor, and overall success of your bread.
Flour
Flour is the foundation of artisan Italian bread. The type of flour you choose significantly influences the texture and rise of your bread. High-protein flours, whether it’s traditional white, whole wheat, or the Italian 00 flour, provide the necessary gluten network that gives the bread its structure and chewiness. Using the right flour can mean the difference between a dense loaf and a light, airy masterpiece.
Yeast
Yeast is the catalyst for fermentation, responsible for the dough’s rise and the development of complex flavors. A quality yeast not only ensures a robust rise but also contributes subtle, tangy notes that enhance the bread’s overall character. Whether you opt for active dry yeast or instant yeast, consistency in your yeast selection is key to achieving reliable results every time.
Water
Water is essential for hydrating the flour and activating the gluten and yeast. The quality and temperature of water can affect the fermentation process and dough consistency. Soft water is typically preferred as it interacts smoothly with the flour, ensuring a well-hydrated, pliable dough that’s easier to work with and bakes evenly.
Olive Oil
Olive oil adds more than just moisture—it brings a distinct, rich flavor that is central to Italian culinary tradition. A drizzle of high-quality extra virgin olive oil not only enriches the dough but also helps create a tender crumb and a beautifully crisp crust. It’s fruity, robust notes complement the other ingredients, making the bread uniquely aromatic and delicious.
Salt
Salt is a crucial flavor enhancer and a natural regulator of yeast fermentation. In artisan Italian bread, the right amount of salt deepens the flavor, balances the sweetness of the yeast, and ensures that the bread does not become bland. It subtly controls the fermentation process, contributing to a well-rounded taste that highlights the bread’s rustic character.
Choosing the Right Flour for Artisan Bread
The choice of flour is one of the most important decisions you’ll make when baking artisan Italian bread. It lays the groundwork for the texture, flavor, and overall performance of your dough.
Understanding Flour Types
Different flours have varying protein contents and textures, which directly affect gluten formation and dough elasticity. For artisan Italian bread, opting for a high-protein flour is ideal because it creates the structure needed for a well-risen, chewy loaf. Experimenting with different types of flour can also introduce subtle flavor differences, allowing you to customize your bread to your taste.
All-Purpose vs. Bread Flour
While all-purpose flour is versatile, bread flour is specifically designed for creating strong, elastic dough thanks to its higher protein content. Bread flour helps achieve a superior rise and a more resilient crumb, which are critical for that authentic artisan texture. Choosing bread flour can elevate your bread from an everyday loaf to a bakery-quality masterpiece.
The Role of 00 Flour
Italian 00 flour is renowned for its ultra-fine consistency and balanced protein levels, making it a favorite for traditional Italian breads. This flour creates a soft, light crumb while still providing the structure necessary for a satisfying rise. Incorporating 00 flour into your recipe can give your artisan Italian bread a uniquely delicate texture and a refined flavor that echoes the culinary heritage of Italy.
The Role of Olive Oil and Salt in Flavor
Olive oil and salt are the unsung heroes in the recipe for artisan Italian bread. Their roles extend beyond basic seasoning, deeply influencing the bread’s flavor profile and overall appeal.
Olive Oil – The Liquid Gold
Extra virgin olive oil is a cornerstone of Italian cooking, celebrated for its rich, fruity flavor and velvety texture. In artisan bread, olive oil adds moisture, softens the crumb, and contributes to a golden, crisp crust. Its aromatic qualities infuse the dough, creating layers of flavor that make each bite a true culinary experience. Choosing a high-quality extra virgin olive oil is paramount to capturing the authentic taste of Italian bread.
Salt – The Essential Flavor Enhancer
Salt does more than simply season the bread; it is integral to controlling the fermentation process and enhancing the natural flavors of the other ingredients. By regulating yeast activity, salt helps maintain a balanced rise, preventing the dough from over-fermenting. This balance not only improves the texture but also brings out the subtle nuances in flavor that define artisan Italian bread. A precise measurement of salt is crucial for achieving a harmonious blend where no single ingredient overpowers the others.
The Balance of Flavors
The interplay between olive oil and salt is where the true art of artisan Italian bread comes to life. Olive oil enriches the dough with its luxurious, mellow taste, while salt ensures that every flavor is accentuated without overwhelming the palate. This delicate balance is key to creating a bread that is not only structurally sound but also irresistibly flavorful—a perfect reflection of Italy’s rich baking traditions.
By understanding and mastering these ingredients, you’re well on your way to baking a loaf of artisan Italian bread that is both authentically Italian and uniquely your own.
Step-by-Step Recipe for Homemade Artisan Italian Bread
Creating artisan Italian bread is an immersive journey from mixing the dough to achieving that coveted crusty finish. The process marries traditional techniques with a few modern tweaks to help you achieve bakery-quality results right in your home kitchen. Below is an in-depth guide broken down into essential phases with further details to ensure every step is crystal clear.
Preparation and Mixing the Dough
Begin your bread-making adventure with a well-prepared setup and a deep understanding of your ingredients and tools. Proper preparation sets the foundation for a successful dough.
Gathering Your Ingredients and Tools
Start by assembling all your essentials: quality flour (preferably Italian 00 or bread flour), yeast, water, olive oil, and salt. Ensure you have a large mixing bowl, a digital scale for accurate measurements, and a sturdy surface for kneading. Having all your ingredients measured out (a method known as mise en place) helps create a smooth, stress-free process.
Measuring and Combining the Ingredients
Accuracy is key in bread making. Use your digital scale to measure ingredients precisely. Start by mixing the dry ingredients in a bowl before gradually adding water and olive oil. Stir gently to incorporate everything, ensuring that no pockets of dry flour remain. This method helps in forming a uniform dough that’s easier to work with.
The Kneading Process and Techniques
Kneading is critical to develop gluten, which gives the bread its structure and airy texture. Transfer the dough onto a lightly floured surface and knead using a rhythmic push-and-fold technique. Aim for about 10–15 minutes of kneading until the dough becomes smooth and elastic. If you prefer, you can use a stand mixer with a dough hook, but traditional hand kneading often yields the best results for artisan bread.
Tips for a Well-Mixed Dough
Keep an eye on the dough’s consistency. It should be slightly tacky but not overly sticky. If needed, add a little more flour gradually. Resting the dough for 10 minutes before final kneading can also help the gluten relax, making the process easier and more effective.
Fermentation and Proofing
Allowing the dough to rest and rise is where flavor and texture develop, transforming simple ingredients into a delicious, airy loaf.
Understanding the Role of Fermentation
Fermentation is more than just a waiting period; it’s when the yeast activates and produces carbon dioxide, which makes the dough rise. This process not only improves the bread’s texture but also deepens its flavor profile. The longer the fermentation, the more nuanced the flavor becomes.
Proper Temperature and Environment for Proofing
For optimal fermentation, keep your dough in a warm, draft-free area. Ideal proofing temperatures are around 75°F to 80°F (24°C to 27°C). You can cover your dough with a damp cloth or plastic wrap to maintain moisture and prevent a crust from forming during the rising period.
Tools: Using a Proofing Basket and Dough Scraper
A proofing basket (banneton) helps the dough maintain its shape while developing a beautiful, patterned surface. Use a dough scraper to gently transfer the dough without deflating it, ensuring that the structure remains intact. These tools contribute to both the appearance and the final texture of your bread.
Signs of a Perfectly Risen Dough
Watch for the dough to roughly double in size, a clear sign that fermentation is complete. The dough should appear airy and slightly domed on top. If it hasn’t risen enough, give it extra time, but avoid over-proofing, which can lead to a flat, dense loaf.
Baking Techniques for Artisan Italian Bread
This is where the magic happens: turning your well-prepared dough into a golden, crusty masterpiece.
Preheating Your Oven and Using a Baking Stone
Begin by placing your baking stone in the oven and preheating it to a high temperature (around 475°F or 245°C). The stone ensures even heat distribution, which is crucial for developing a crisp crust. Allow ample time for the stone to heat up fully, as a properly preheated stone is key to replicating a professional bakery oven.
Achieving the Perfect Crust
A signature of artisan Italian bread is its beautifully crackled, deeply browned crust. To achieve this, consider introducing steam into your oven during the initial baking phase. This can be done by placing a shallow pan of water at the bottom of the oven or spritzing the dough lightly with water just before baking. The steam helps gelatinize the surface starches, contributing to a crunchy exterior.
Monitoring Oven Temperature with an Oven Thermometer
Even if your oven has a built-in temperature gauge, an external oven thermometer can help you ensure accuracy. Ovens can sometimes run hotter or colder than their settings indicate, and maintaining the correct temperature is essential for the optimal rise and crust formation of your bread.
Final Baking Tips and Adjustments
Keep an eye on your bread during the final stages of baking. If you notice the crust browning too quickly, lower the temperature slightly or cover the bread loosely with aluminum foil. Conversely, if the crust seems pale, increase the temperature for the last few minutes of baking. Once done, allow the bread to cool on a rack, which helps prevent condensation that could soften the crust.
Artisan Italian Bread Baking Tips and Tricks
This section dives deep into the techniques and nuances that help you master the art of baking artisan Italian bread. From achieving that coveted crust to avoiding common pitfalls and perfecting the open, airy crumb, each tip is designed to elevate your baking skills and bring out the best in your homemade bread.
How to Achieve a Crusty Exterior
A hallmark of artisan Italian bread is its beautifully crusted exterior—a result of precise baking techniques that create a robust, flavorful outer layer.
Utilizing Steam Effectively
Incorporating steam in the initial stages of baking is key to developing a crisp crust. When the dough enters a hot oven, moisture on its surface delays the formation of a crust, allowing the bread to expand fully before the exterior sets. To achieve this, you can:
- Place a shallow pan of water on the bottom of the oven.
- Spray the oven walls with water during the first few minutes of baking.
- Consider using a Dutch oven, which traps steam released from the dough itself.
Maintaining Optimal Baking Temperature
The right temperature is crucial for balancing crust formation and interior baking. A high initial temperature, typically around 475°F to 500°F, helps create steam and encourages a rapid rise, setting the stage for a golden, crunchy crust. As baking continues, slightly lowering the temperature can help ensure the bread cooks evenly without burning.
Mastering the Art of Scoring
Scoring, or slashing the dough just before baking, isn’t just decorative—it allows the bread to expand predictably and contributes to a uniform crust. Use a sharp blade to make deliberate cuts that guide the dough’s expansion. The depth and pattern of your cuts can affect the final appearance and texture, making scoring both an art and a science in artisan bread baking.
Common Mistakes to Avoid
Even seasoned bakers can stumble over a few common errors. Recognizing and avoiding these pitfalls is essential for consistently producing high-quality artisan Italian bread.
Avoiding Over-Proofing
Over-proofing occurs when the dough is left to rise for too long, leading to a weak structure that collapses during baking. To avoid this:
- Keep a close eye on your dough’s rise time.
- Use the finger test to check if the dough is ready: gently press the surface, and if the indentation springs back slowly, it’s at the right stage.
- Adjust proofing times based on ambient temperature and humidity.
Preventing Under-Kneading
Under-kneading can result in an uneven texture, with dense pockets and insufficient gluten development. Ensure that you:
- Knead the dough until it’s smooth and elastic.
- Use techniques like the stretch-and-fold method during bulk fermentation to strengthen the dough.
- Allow ample time for kneading; rushing this step can compromise the final texture.
Managing Dough Consistency
A dough that is too wet or too dry can disrupt the balance between crust and crumb. Consistency is key:
- Measure ingredients carefully.
- Adjust hydration levels based on the type of flour used.
- Monitor environmental factors, as temperature and humidity can affect the dough’s moisture content.
Perfecting the Crumb Structure
The interior of artisan Italian bread is celebrated for its open, airy crumb. Achieving this delicate balance of holes and structure requires careful attention to several factors.
Understanding Fermentation
The fermentation process is essential for flavor and texture. Allowing the dough to ferment slowly develops complex flavors and creates the necessary gas pockets for an open crumb:
- Consider a long, slow fermentation, possibly with an overnight rise.
- Use a sourdough starter or a preferment to add depth to the flavor profile.
- Be patient; the fermentation process is as much an art as it is a science.
Implementing Proper Shaping Techniques
How you shape the dough can influence the crumb structure significantly. Techniques that encourage an even distribution of air pockets include:
- Gentle handling to avoid deflating the dough.
- Using a light touch when forming the loaf.
- Creating surface tension through proper shaping, which supports an open, uniform crumb during baking.
Optimizing the Baking Environment
The environment in which your bread bakes also plays a role. An oven that maintains a steady temperature and proper humidity levels can enhance the formation of both crust and crumb:
- Use a baking stone or steel to distribute heat evenly.
- Ensure your oven is preheated thoroughly before baking.
- Monitor and adjust for any fluctuations in temperature during the baking process.
How to Serve and Enjoy Artisan Italian Bread
Artisan Italian bread is not only a delicious creation on its own, but it also serves as a versatile companion to a range of Italian culinary delights. Whether you’re serving it as an accompaniment, transforming it into a star ingredient in classic dishes, or simply savoring it fresh from the oven, there are countless ways to celebrate this bread. Below, you’ll find detailed insights and tips on serving, pairing, and preserving your homemade artisan Italian bread.
Traditional Italian Serving Ideas
Explore the timeless tradition of enjoying Italian bread the way it’s meant to be savored—simple, rustic, and bursting with flavor. Here are some subtopics to consider:
Pairings with Olive Oil
- Flavored Olive Oil Dips: Drizzle extra virgin olive oil over your sliced bread and season it with sea salt, cracked pepper, and a pinch of red pepper flakes for a delightful starter.
- Herb-Infused Oils: Create your own herb-infused olive oil by adding rosemary, thyme, or basil. This elevates the flavor profile and makes for a perfect dip or drizzle over salads.
Pairings with Balsamic Vinegar
- Classic Balsamic Reduction: Serve a small dish of balsamic reduction alongside your bread. The sweet and tangy notes of the reduction beautifully contrast with the bread’s crusty exterior.
- Balsamic and Olive Oil Blend: Combine balsamic vinegar with olive oil to create a balanced dipping sauce that enhances the natural flavors of the bread.
Pairings with Fresh Tomatoes and More
- Tomato Bruschetta Topping: Dice fresh, ripe tomatoes and mix them with garlic, basil, and a drizzle of olive oil. Spoon this vibrant mixture onto slices of artisan bread for a refreshing appetizer.
- Caprese-Inspired Combos: Layer slices of fresh mozzarella and tomatoes on your bread, then top with a drizzle of balsamic glaze for a simple yet elegant treat.
Using Artisan Bread for Italian Dishes
Turn your artisan Italian bread into a cornerstone ingredient in a variety of Italian recipes. Here are some ideas to incorporate your bread into delicious dishes:
Making Classic Bruschetta
- Preparation: Toast your artisan bread slices until they’re perfectly crisp.
- Toppings: Top with a mixture of diced tomatoes, basil, garlic, and a splash of olive oil. Add a sprinkle of salt and pepper to finish.
- Serving Tip: Serve immediately to retain the contrast between the crunchy toast and the fresh, juicy topping.
Creating Gourmet Paninis
- Sandwich Ideas: Use slices of artisan bread to make paninis by layering cured meats, cheeses, fresh vegetables, and spreads like pesto or tapenade.
- Grilling Techniques: Press your sandwich on a panini grill until the bread is golden and the fillings are warm, creating a satisfying blend of textures and flavors.
- Flavor Variations: Experiment with ingredients such as sun-dried tomatoes, arugula, and prosciutto for a distinctly Italian twist.
Serving as a Side for Pasta and More
- Accompaniments: Pair your bread with hearty pasta dishes, stews, or salads. The bread’s robust flavor complements rich sauces and adds a satisfying crunch.
- Dipping Sauces: Offer a variety of dipping sauces like garlic butter or a spicy arrabbiata to enhance the dining experience.
- Cultural Touch: Embrace the Italian tradition of using bread to mop up every last bit of flavorful sauce on your plate.
Storing and Reheating Homemade Bread
Proper storage and reheating techniques ensure that your artisan Italian bread remains fresh and flavorful, even after the first bite. Here are some detailed tips:
Best Practices for Storing Artisan Bread
- Short-Term Storage: For consumption within a day or two, store the bread in a paper bag or wrapped in a clean kitchen towel to maintain its crisp crust while allowing it to breathe.
- Long-Term Storage: If you need to store the bread for longer, slice it and freeze the pieces in an airtight bag. This preserves the texture and flavor without the risk of staling.
- Avoiding Moisture: Keep the bread away from plastic bags for short-term storage, as trapped moisture can lead to a soggy crust.
Techniques for Reheating to Maintain Freshness
- Oven Reheating: Preheat your oven to 375°F (190°C) and place the bread directly on the oven rack for 5-10 minutes. This method helps to revive the crust and refresh the interior.
- Skillet Method: For a quicker option, lightly toast the bread in a dry skillet over medium heat. This method is especially useful for reviving slices for sandwiches or bruschetta.
- Microwave Caution: If you must use a microwave, do so sparingly, as it can make the bread chewy. A brief burst followed by a quick crisp-up in a hot pan may be necessary.
Tips for Avoiding Stale Bread
- Timing Is Key: Consume the bread within a day for optimal taste and texture. If stored properly, freezing can extend its shelf life without significant quality loss.
- Refresh with Water: Lightly mist the bread with water before reheating in the oven. This helps to rehydrate the crust and restore its original crispness.
- Proper Slicing: Slice the bread only when you’re ready to eat it, as pre-slicing can lead to faster staling due to increased exposure to air.
Conclusion
Making homemade artisan Italian bread is a truly rewarding experience that brings the taste and aroma of authentic Italian cuisine right into your kitchen. From the rustic crust to the soft, flavorful interior, each loaf is a testament to the joy of working with simple ingredients to create something extraordinary. Whether you’re a seasoned baker or a beginner, this recipe offers a wonderful way to explore the art of bread-making.
We encourage you to try this artisan Italian bread recipe and enjoy the delicious results with your family and friends. Don’t forget to share your baking experiences and tips in the comments—your feedback could inspire others to embark on their bread-baking journey!
** Similar meals that may interest you:
How to Make Perfect Biscuits and Gravy from Scratch
2 thoughts on “Artisan Italian Bread: Discover the Best Recipe for Homemade”