
There’s something magical about a dessert that brings smiles to every face at the table. Whether it’s a family gathering, a potluck, or just a cozy night in, this no-bake treat is a guaranteed hit. With layers of creamy goodness and crunchy cookies, it’s as fun to make as it is to eat.
What makes this dirt cake stand out? It’s simple—no oven required, just a handful of everyday ingredients like Cool Whip and cream cheese. The contrast between the velvety pudding and crumbled cookies creates an irresistible texture. Plus, you can get creative with toppings like gummy worms or seasonal sprinkles.
Perfect for busy weeknights or last-minute parties, this dessert comes together in minutes. Serve it in a 9×13 pan for easy sharing, and watch it disappear faster than you can say “seconds, please!”
Table of Contents
Why You’ll Love This Oreo Dirt Cake Recipe
Perfect for gatherings, this dessert delivers both fun and flavor without any baking hassle. Its playful “dirt” layers and creamy filling appeal to all ages, making it a hit at birthdays, potlucks, or even themed parties.
No oven? No problem! This dirt cake chills in just 4 hours, but you can prep it a day ahead—ideal for stress-free entertaining. Customize it with seasonal touches: gummy worms for summer, pastel sprinkles for Easter, or even mint-flavored pudding for St. Patrick’s Day.
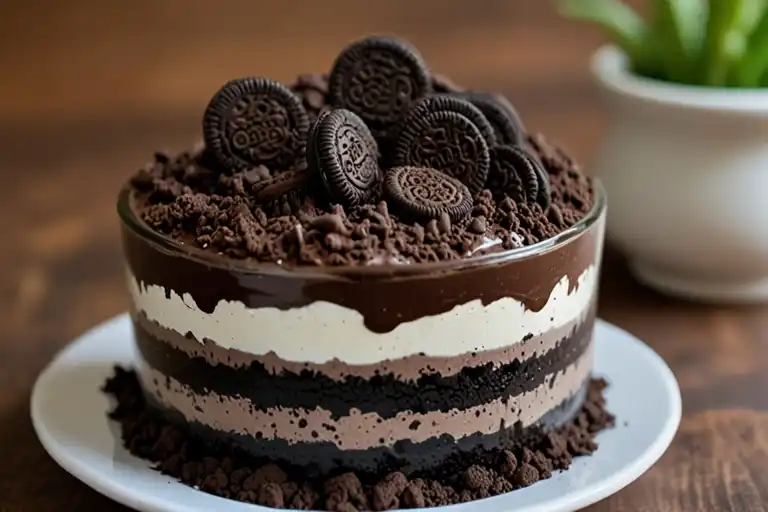
For a stunning presentation, layer it in a trifle dish to showcase the alternating textures. Need to feed a crowd? The recipe serves up to 20 and travels well for picnics or office events.
| Feature | Benefit |
|---|---|
| No-Bake | Saves time and energy |
| Make-Ahead | Stays fresh in the refrigerator for 3 days |
| Versatile | Swap ingredients (e.g., gluten-free cookies) |
Compared to Banana Pudding or Cream Puff Cake, this version requires fewer steps but packs the same nostalgic comfort. Whether you’re a beginner or a seasoned baker, it’s a foolproof way to impress.
Ingredients You’ll Need
Gathering the right ingredients is the first step to creating this crowd-pleasing dessert. Each component plays a role in balancing textures and flavors, from the crunchy base to the velvety filling. Here’s what to grab before you begin.
For the Oreo Layers
When constructing these irresistible layers, the foundation is key. Start with 14 oz of Double Stuf Oreos to achieve that ideal cream-to-cookie ratio. The extra cream not only enriches the flavor but also contributes to a moist, indulgent texture that stands out in every bite. If you’re catering to gluten-sensitive guests, certified gluten-free Oreos serve as a perfect alternative, ensuring that everyone can savor the dessert.
Next, pair the crushed cookies with 1/2 cup of salted butter, softened to room temperature. The butter works its magic by binding the crumbs together, creating a sturdy yet tender base layer that holds up beautifully under additional fillings or toppings. While a food processor is the quickest and most efficient tool for achieving a uniform, fine crumb, you can also opt for a rolling pin and a resealable bag—a great option if you prefer a hands-on approach. This method, though a bit more manual, still delivers a consistently textured mixture.
For an extra burst of flavor and versatility, consider enhancing the base with a light sprinkle of cinnamon or even a touch of melted chocolate mixed in with the crumbs. These subtle additions can elevate the overall taste, providing a warm, aromatic note that complements the rich creaminess of the Oreos.
This approach not only sets a solid foundation for your dessert but also infuses it with layers of texture and flavor, making each bite a delightful blend of crunchy and creamy. Enjoy the process of building your dessert masterpiece, knowing that each element has been carefully chosen to create a harmonious and satisfying treat.
For the Creamy Pudding Filling
The filling combines 8 oz of softened cream cheese and 1 cup of powdered sugar for a smooth, lightly sweetened base. Opt for Jell-O Instant French Vanilla Pudding—its rich flavor outperforms generic brands.
Whisk 2 large boxes (10.2 oz total) of pudding mix with 3.5 cups of cold milk (whole or 2% for creaminess). Fold in 12 oz of Cool Whip for extra fluffiness. A hand mixer ensures no lumps remain.
Pro Tip: Store leftover crushed cookies in an airtight bag to maintain freshness—pre-measure ingredients to streamline assembly.
Step-by-Step Instructions
Ready to make a dessert that’s as fun to assemble as it is to eat? These foolproof steps ensure perfect layers every time. Grab your tools, and let’s dive in.
Step 1: Crush the Oreos
Start by breaking down your Oreos into uniform, coarse crumbs that provide a perfect balance of crunch and cohesion for your dessert. For uniform crumbs, use a food processor—simply add the cookies and pulse until they resemble coarse sand. This method yields consistent, ¼–½-inch pieces that blend seamlessly into your recipe.
If you don’t have a food processor, don’t worry. Place the Oreos in a sturdy resealable bag and roll over them with a rolling pin. Apply even pressure and work in small batches if needed to avoid overly fine or uneven pieces. This alternative method still produces a delightful mix of textures that can enhance your dessert’s overall appeal.
Uniformly crushed Oreos are key to ensuring that your base or topping holds together well while delivering a satisfying bite in every spoonful. Whether you’re making a crust for a cheesecake or layering a fun no-bake treat, achieving that ideal crumb size will help balance the flavors and textures perfectly.
Step 2: Prepare the Pudding Mixture
Begin by whisking the instant pudding mix with cold milk until it thickens—this usually takes about 2 minutes. This step ensures that the pudding is smooth and evenly mixed. Once thickened, cover the bowl and let the pudding chill in the refrigerator for about 30 minutes to fully set, which creates a firm base for the dessert.
While the pudding is setting, focus on creating the complementary cream layer. In a separate bowl, beat together softened cream cheese, butter, and powdered sugar until the mixture is silky and free of lumps. For the best results, ensure both the cream cheese and butter are at room temperature before starting, as this helps them blend together more easily.
After achieving a smooth cream mixture, gently fold in Cool Whip. This step is crucial—mix slowly and carefully to maintain the light, airy texture provided by the Cool Whip, which will contribute to a fluffy overall consistency. This delicate folding technique preserves the whipped quality, giving the dessert a creamy, melt-in-your-mouth finish.
This layered pudding mixture can serve as a delicious filling or topping for various desserts, balancing richness with a light, refreshing texture.
Step 3: Layer and Assemble
In a trifle dish or pan, alternate 2 cups of pudding mixture with ½ cup of crumbs. Repeat, ending with a generous sprinkle of reserved crumbs on top. Pro Tip: Use a silicone spatula to spread layers without disrupting the base.
Chill in the refrigerator for at least 4 hours—this lets the flavors meld and layers set. For best results, serve within 3 days. Avoid lumpy filling by ensuring all ingredients are at room temperature before mixing.
Creative Decorating Ideas
Turn your dessert into a playful masterpiece with these decorating tricks. Whether you’re serving kids or adults, a few thoughtful touches can elevate the presentation and flavor experience.

Gummy Worms and Themed Toppings
For a whimsical touch, press gummy worms halfway into the chocolate crumbs. They’ll look like tiny critters crawling through dirt. Seasonal themes work wonders too:
- Easter: Swap worms for pastel Peeps or candy flowers.
- Halloween: Add cookie tombstones and orange sprinkles.
- Summer: Use sand buckets and toy shovels for a beach vibe.
Trifle Dish Presentation
Showcase the layers in a clear trifle dish. Alternate ingredients for a striped effect, and garnish with mint sprigs or edible glitter. Pro Tip: Reserve extra crumbs for the top to add texture contrast.
| Idea | Materials Needed |
|---|---|
| Individual Servings | Clear plastic cups, layered pudding, and crumbs |
| Holiday Variations | Themed candies, colored sprinkles |
| Texture Boost | Crushed chocolate cookies mixed into pudding |
Keep decorations minimal to avoid overwhelming the dessert. A few well-placed toppings make a bigger impact than a crowded design.
Oreo Dirt Cake Variations
Want to mix things up? Try these tasty twists on a classic treat. Whether you crave richer chocolate or need allergy-friendly options, these swaps keep the flavor and fun intact.
Chocolate Lover’s Dream
Swap vanilla pudding for a
chocolate instant mix. Pair it with dark cocoa cookies for extra depth. For a mocha kick, add 1 tsp espresso powder to the pudding mix.
Dietary-Friendly Options
Use gluten-free sandwich cookies and certified gluten-free pudding. For dairy-free versions, try almond milk and vegan cream cheese. Coconut whipped topping seamlessly replaces Cool Whip.
| Variation | Key Substitutions |
|---|---|
| Lower-Sugar | Reduce powdered sugar by 25% or use sugar-free pudding |
| Nut-Free | Check cookie labels for allergen warnings |
| Caramel Swirl | Layer with caramel sauce between chocolate crumbs |
Tip: Always label desserts clearly at gatherings to avoid confusion. A small sign like “Gluten-Free” helps guests enjoy safely.
Tips for the Perfect Dirt Cake
Mastering this no-bake delight is easier than you think with these expert tips. Whether you’re a first-timer or a seasoned pro, these insights will help you avoid common pitfalls and achieve the ideal texture every time.

Chilling and Storage Essentials
Patience pays off with this dessert. For firm layers that hold their shape, refrigerate for at least 4 hours. Extend the chilling time to 12 hours for deeper flavor development.
Proper storage keeps your creation fresh. Always cover with plastic wrap pressed directly onto the surface. This prevents drying while maintaining the perfect consistency for up to 3 days in the refrigerator.
- Avoid freezing: The cookies absorb moisture and turn soggy when thawed
- Texture fix: If your mixture looks lumpy, blend briefly with a hand mixer before layering
- Large batches: Use both a 9×13 pan and trifle dish when doubling the recipe
Smart Ingredient Swaps
Customize your dessert with these easy substitutions that maintain the delicious flavor profile:
- Whipped topping: Replace Cool Whip with stabilized homemade whipped cream (add 1 tsp gelatin)
- Pudding note: Only instant pudding works—cook-and-serve varieties won’t set properly
- Milk alternatives: Whole or 2% milk works best, but almond milk creates a dairy-free version
Remember to label any modified ingredients when serving guests with dietary restrictions. A small sign like “Gluten-Free” helps everyone enjoy safety.
Serving and Storage Recommendations
Planning a stress-free party starts with smart dessert prep. These tips ensure your treat stays fresh, travels well, and wows guests—whether you’re hosting or bringing a dish to share.
Make-Ahead Instructions
Prepping components up to 24 hours early can save time. Crush cookies and mix pudding separately, then store in airtight containers. Assemble layers 4 hours before serving for perfect texture.
- Refrigerator storage: Cover assembled dessert with plastic wrap touching the surface to prevent drying.
- Leftovers stay fresh for 72 hours—ideal for midweek treats.
Individual Dirt Cake Cups
For easy serving, layer ¼ cup crumbs and ½ cup filling in 8oz clear cups. Top with gummy worms or sprinkles for a playful touch. Pro Tip: Use reusable plastic cups with lids for mess-free transport.
| Serving Style | Best For | Prep Tip |
|---|---|---|
| Individual cups | Portion control, kids’ parties | Pre-layer 12+ cups for grab-and-go ease |
| Trifle Dish | Showcasing layers | Chill 6+ hours for clean slices |
| Aluminum Pans | Potlucks, large groups | Double ingredients for 24+ servings |
For outdoor events, pack cups in a cooler with ice packs. Label dietary-friendly versions clearly (e.g., “Gluten-Free”) to help guests enjoy safely.
Conclusion
A dessert this easy shouldn’t taste this good! With layers of creamy flavor and crunchy texture, this dirt cake is a foolproof hit for birthdays, potlucks, or weeknight treats.
Share your creation with #PlowingThroughLife—we’d love to see your twists! At just 230kcal per serving, it’s a guilt-free indulgence. Grab the printable recipe card for quick kitchen access.
Craving more no-bake wins? Try our Banana Pudding or Cream Puff Cake next. Updated with new photos, this fan-favorite (rated 4.84/5!) saves time without skimping on taste.
FAQ
Can I use a different pudding flavor?
Yes! While vanilla pudding is classic, chocolate or butterscotch pudding adds a fun twist. Just make sure it’s instant pudding for the right texture.
How long should I chill the dessert before serving?
For the best results, refrigerate for at least 4 hours. Overnight chilling helps the layers set perfectly.
Can I make this gluten-free?
Absolutely! Swap regular Oreos for gluten-free chocolate sandwich cookies and check that your pudding mix is gluten-free.
What’s the best way to crush the cookies?
A food processor works fastest, but a rolling pin or zip-top bag and hands work too. Leave some chunks for texture.
Can I substitute Cool Whip?
Yes, homemade whipped cream is a great alternative. Just beat heavy cream with powdered sugar until stiff peaks form.
How do I store leftovers?
Keep them covered in the fridge for up to 3 days. The layers stay fresh, though the cookies soften over time.
Can I make individual servings?
Definitely! Layer the ingredients in small cups or mason jars for a fun, portion-controlled treat.
What toppings work best?
Gummy worms, crushed cookies, or chocolate shavings add playful flair. Fresh berries also balance the sweetness.
1 thought on “The Best Oreo Dirt Cake Recipe You’ll Ever Try”